Inspired by this post of Billy T Crooks in our Jamzone Private Group, here is a tutorial for you.
Sharing screens can enhance your Jamzone experience, especially when performing with others. While waiting for this feature to be implemented in your app, this guide provides a straightforward method to share your Jamzone screen on another monitor, ensuring a more performance setup, especially if you’re playing in a band.
What You Need
To share screens between Jamzone users, you’ll need a few key pieces of equipment and some simple steps.
You’ll need:- An Ipad
- an HDMI-compatible monitor
- an HDMI/USB-C dongle like the Anker USB C to HDMI Adapter
- For audio, a Bluetooth receiver plugged to your board works well (Note that a cable connecting your iPad to your speaker/board may be a safer way).
- if you want to charge your device while using it, consider a multiport adapter such as the Apple USB-C Digital AV Multiport Adapter.
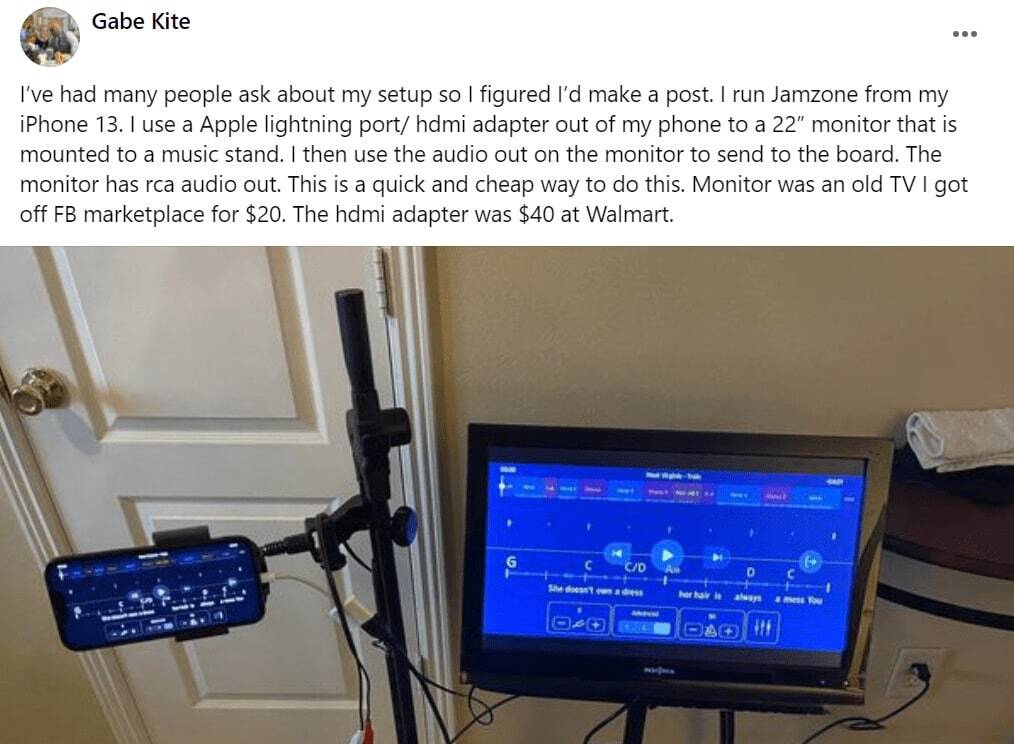
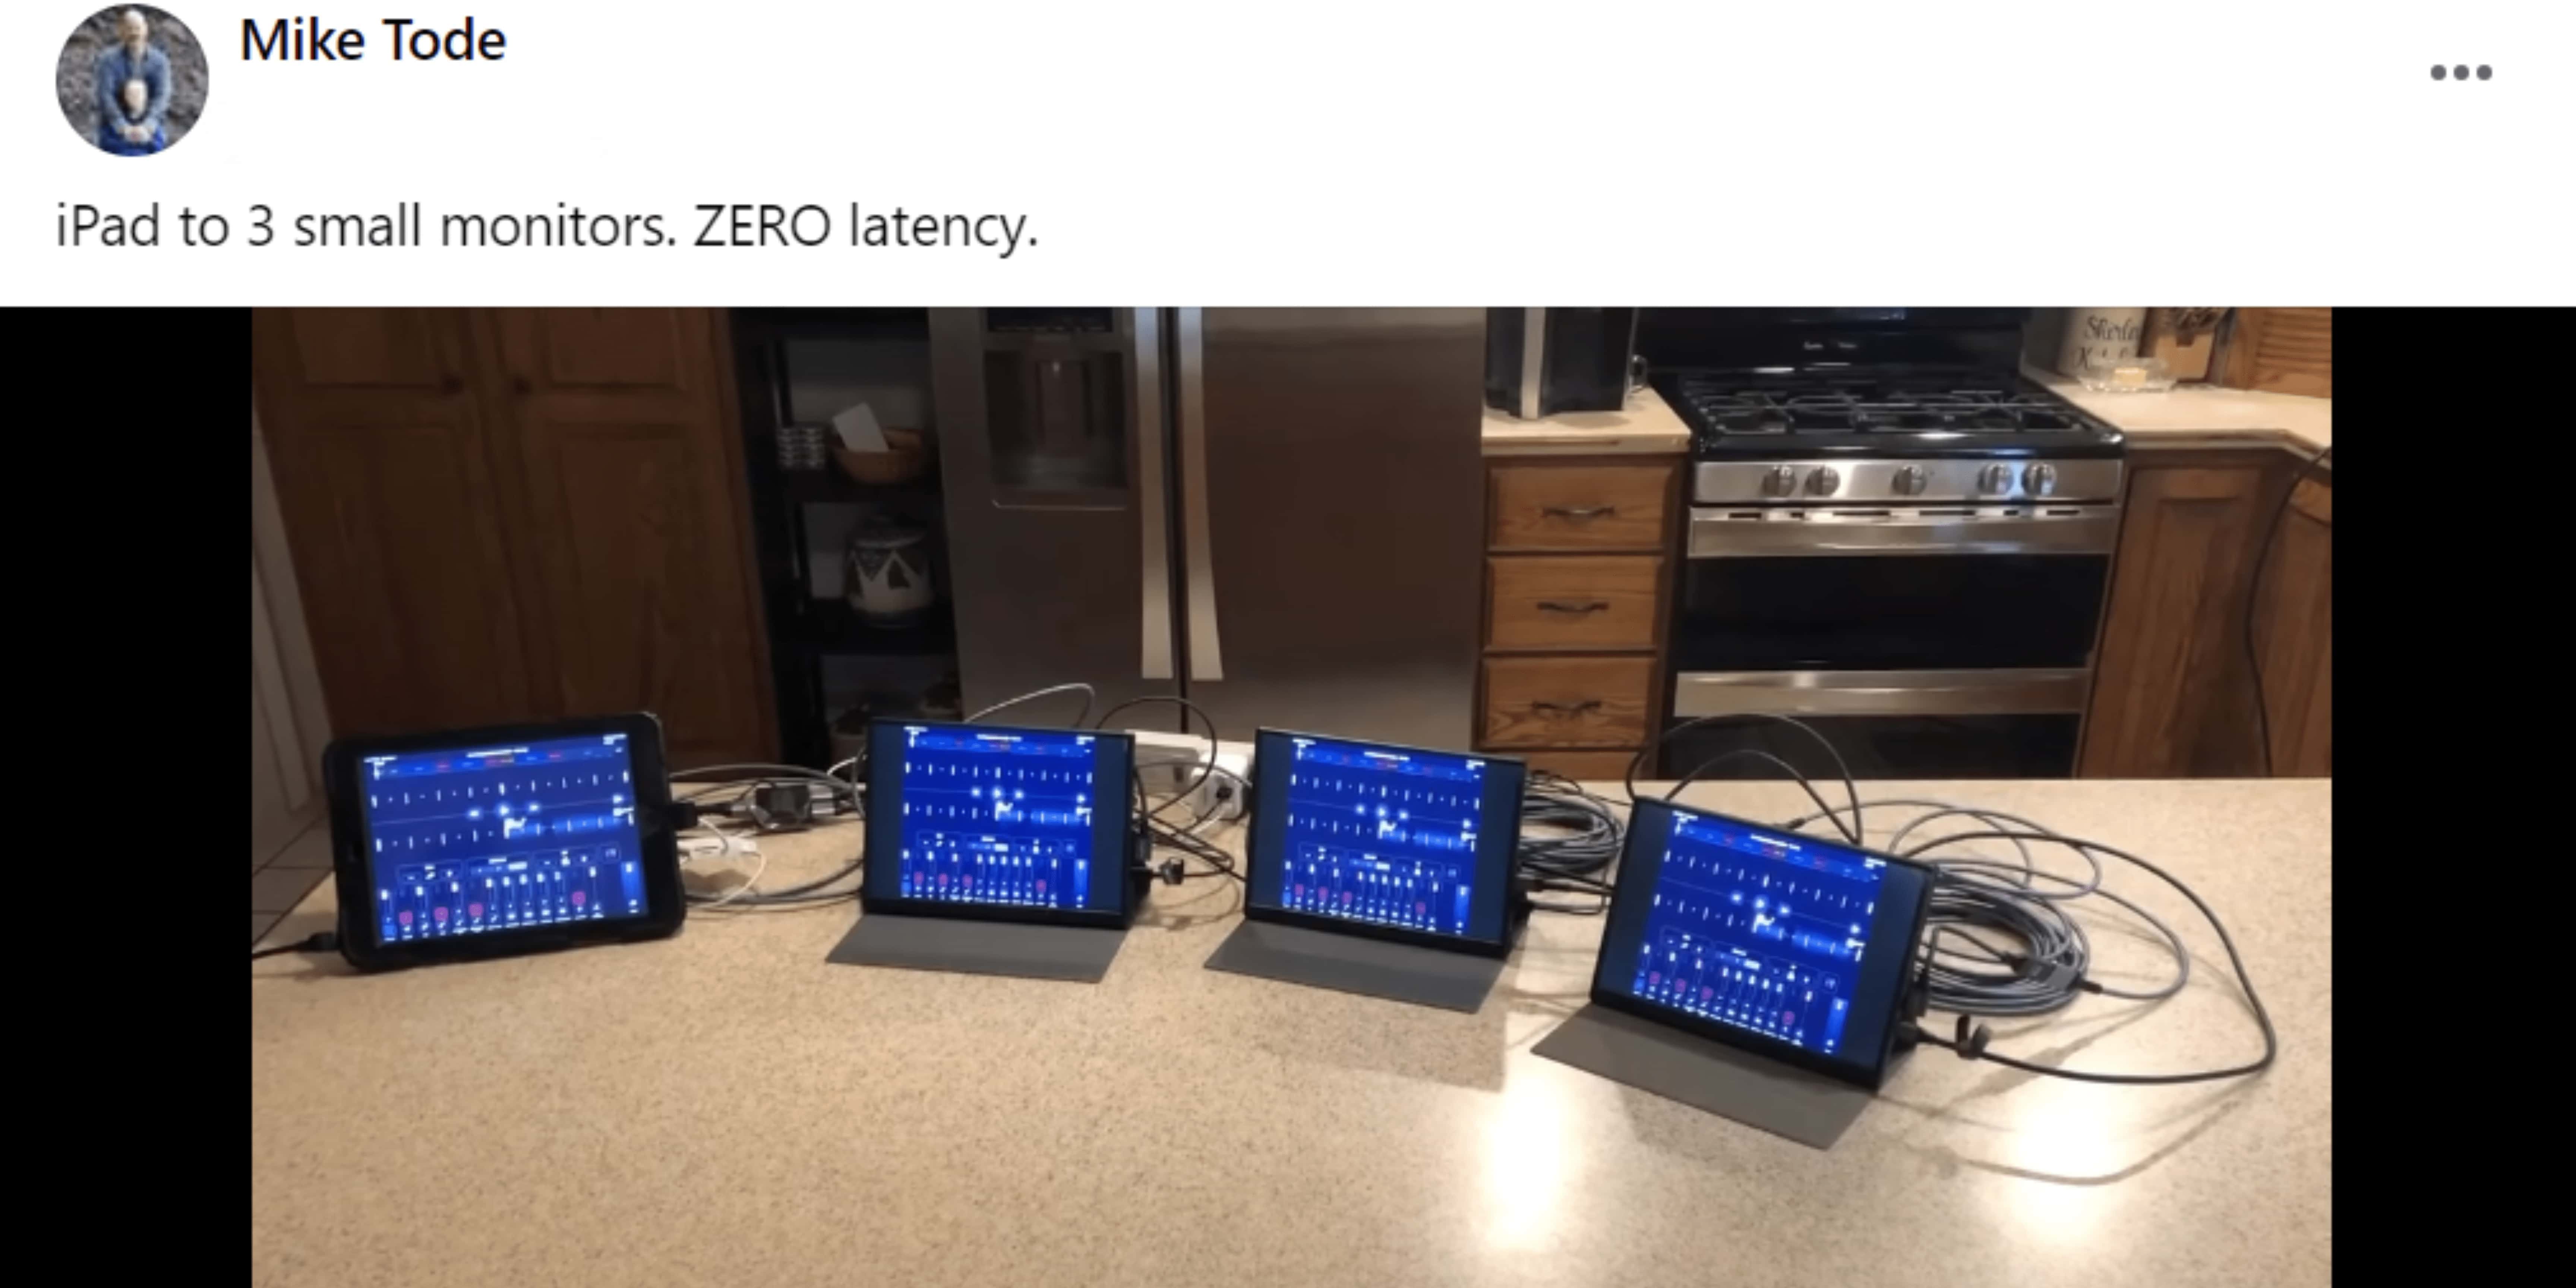
Here is a great and simple setup by our Jamzone user Gabe Kite :
Just Plug In and Go

The concept of collaborative music performances has evolved significantly with technology. Sharing screens allows musicians to synchronize better, enhancing the overall performance and audience experience. This setup can transform a simple duo into a well-coordinated act, making your performance memorable.
- Connect your iPad Pro to the HDMI monitor using the HDMI/USB-C dongle. Ensure your monitor is powered on and set to the correct input.
- If you’re using Bluetooth, open the Control Center on your iPad and select the audio output to your Bluetooth receiver. This ensures your audio goes through your main audio system.
- To conserve battery life, dim the screen on your iPad.
- If you need to charge your iPad during the performance, use a multiport adapter.
- Launch your Jamzone session and jam!
WIRELESS OPTION

2 options are available:
- Using Airplay/Chromecast to an external screen (Apple and Google Devices)
- Using Sidecar with a MacBook + an iPad (for Apple users only)
🖥️ Airplay (Apple Devices)
- Connect to Wi-Fi: Ensure your Apple device and external screen (Apple TV or AirPlay-compatible TV) are on the same Wi-Fi network.
- Enable AirPlay:
- iPhone/iPad: Open Control Center, tap Screen Mirroring, select your external screen.
- Mac: Click the AirPlay icon in the menu bar, choose your external screen.
- Enter Code: Enter the AirPlay code shown on the external screen if prompted.
🛜 Chromecast (Google Devices)
- Connect to Wi-Fi: Ensure your device and Chromecast are on the same Wi-Fi network.
- Set Up Chromecast: Plug Chromecast into your TV and set it up using the Google Home app.
- Enable Casting:
- Android: Open Google Home, tap Cast Screen/Audio, select Chromecast.
- Chrome Browser: Click the three-dot menu, select Cast, choose Chromecast.
- Cast-compatible App: Tap the Cast icon, select Chromecast.
These steps will mirror or cast your screen to an external display.
💻 Sidecar (Apple Devices)
To mirror an iPad screen on a monitor using Sidecar:
- Check Compatibility: Ensure your devices support Sidecar (macOS Catalina or later, iPadOS 13 or later).
- Connect Devices:
- Wired: Use a USB-C or Lightning cable.
- Wireless: Ensure both devices are on the same Apple ID, Wi-Fi network, and have Bluetooth and Handoff enabled.
- Activate Sidecar:
- On your Mac, click the AirPlay icon in the menu bar.
- Select your iPad and choose "Mirror Display."
- Adjust Settings: In System Preferences > Displays on your Mac, arrange and adjust display settings.
This mirrors your iPad screen to a monitor connected to your Mac.
Showtime!

By following these simple steps, you can improve your setup and create a more immersive environment for yourself or your band.
👉 If you need any tips from other users on how to use your gear, join the Jamzone community here:
Ready? Time to shine! Let's kick off the show!
